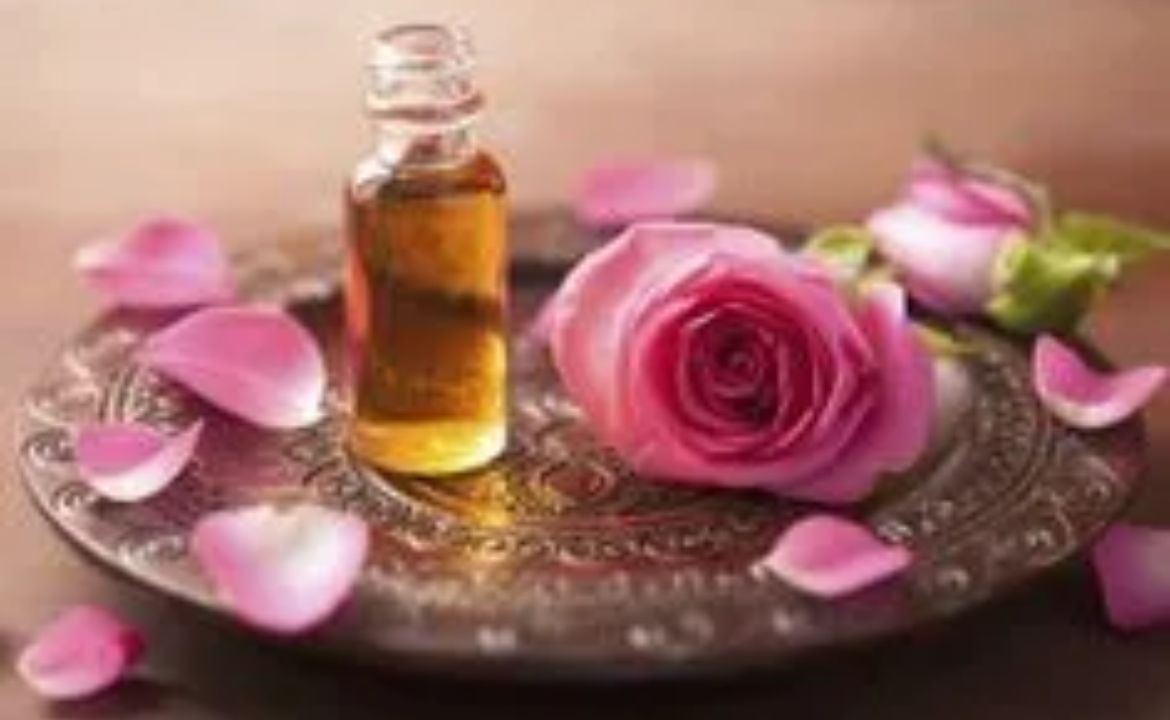
The intoxicating fragrance of roses has captivated humanity for centuries, and capturing this essence in oil form brings the luxury of these blooms into your daily life. Whether you’re interested in natural skincare, aromatherapy, or creating personalized gifts, learning how to make rose oil is a rewarding skill that connects you with traditional herbalism while offering modern benefits. This beginner-friendly guide will walk you through the simple process of creating your own rose-infused oil right in your kitchen.
Understanding Rose Oil: What You’re Actually Making
Before diving into the process, it’s important to understand what homemade rose oil truly is. The commercial rose essential oil you find in stores is typically extracted through steam distillation, requiring hundreds of pounds of rose petals and specialized equipment. What you’ll create at home is rose-infused oil, where the aromatic compounds and beneficial properties of rose petals are extracted into a carrier oil. While different from essential oil, this infused version still offers wonderful fragrance and therapeutic benefits for skincare and aromatherapy.
Choosing Your Roses: The Foundation of Quality
The quality of your rose oil depends heavily on the roses you select. Opt for organic roses whenever possible, as you don’t want pesticides or chemicals in your final product. Homegrown roses from your garden are ideal, but you can also purchase organic roses from farmers’ markets or specialty suppliers. Avoid roses from florists, as these are often treated with preservatives and chemicals.
The most fragrant varieties produce the best oil. Consider using damask roses, which are prized for their intense fragrance, or other heirloom varieties known for their scent. Harvest roses in the morning after the dew has evaporated but before the sun becomes too intense, as this is when their essential oils are most concentrated.
Essential Materials You’ll Need
Gathering your materials beforehand makes the process smooth and enjoyable. You’ll need fresh or dried rose petals (about 1 cup), a carrier oil such as jojoba, sweet almond, or fractionated coconut oil (approximately 1 to 2 cups), a clean glass jar with a tight-fitting lid, cheesecloth or fine mesh strainer, a clean dark glass bottle for storage, and optionally, a sunny windowsill or slow cooker.
The carrier oil you choose matters. Jojoba oil has a long shelf life and closely resembles skin’s natural sebum, making it excellent for skincare applications. Sweet almond oil is lightweight and readily absorbed, while fractionated coconut oil remains liquid at room temperature and has natural antimicrobial properties.
Method 1: Sun Infusion – The Traditional Approach
When you’re ready to learn how to make rose oil using the sun infusion method, start by preparing your petals. If using fresh roses, gently rinse them and allow them to wilt for a few hours or overnight. This reduces moisture content, which helps prevent bacterial growth in your oil. Completely dry petals work wonderfully too.
Place your prepared petals in a clean, sterilized glass jar, filling it about halfway. Pour your chosen carrier oil over the petals until they’re completely submerged with about an inch of oil above them. Gently stir to release any air bubbles trapped among the petals. Seal the jar tightly and place it in a sunny windowsill.
Let the jar sit in sunlight for 2 to 4 weeks, shaking it gently every day or two. The warmth from the sun helps extract the beneficial compounds from the rose petals into the oil. You’ll notice the oil taking on a deeper color and a subtle rose fragrance as the days pass.
After the infusion period, strain the oil through cheesecloth or a fine mesh strainer, squeezing the petals to extract every drop of precious oil. For a stronger scent, you can repeat the process with fresh petals and your already-infused oil, creating what’s called a double or triple infusion.
Method 2: Heat Infusion – The Faster Route
If you’re eager to understand how to make rose oil more quickly, the heat infusion method is your answer. This approach produces results in just a few hours rather than weeks. Combine your rose petals and carrier oil in a slow cooker or double boiler. The ratio remains the same: petals should be completely covered by oil.
Heat the mixture on the lowest setting possible. For a slow cooker, use the “warm” setting; for a double boiler, maintain a temperature around 100 to 140 degrees Fahrenheit. The oil should be warm to the touch but never hot enough to simmer or bubble. Too much heat can degrade the delicate aromatic compounds you’re trying to preserve.
Let the mixture infuse for 4 to 8 hours, stirring occasionally and monitoring the temperature. Once complete, allow the oil to cool slightly before straining through cheesecloth into your storage container. The resulting oil will have a lovely rose scent and beautiful golden to pink hue.
Storing Your Homemade Rose Oil
Proper storage ensures your rose oil maintains its quality for months. Transfer the strained oil into a dark glass bottle, preferably amber or cobalt blue, as light can degrade the oil over time. Store it in a cool, dark place away from direct sunlight and heat sources. A bathroom cabinet or pantry works perfectly.
When stored correctly, rose-infused oil typically lasts 6 to 12 months, depending on your carrier oil. Jojoba and fractionated coconut oil have the longest shelf life. Always label your bottle with the date of creation and the ingredients used. If you notice any off odors or signs of rancidity, discard the oil and make a fresh batch.
Using Your Rose Oil
Your homemade rose oil is incredibly versatile. Apply it directly to your face and body as a luxurious moisturizer, particularly beneficial for dry or mature skin. Add a few drops to your bath for an aromatic spa experience. Use it as a massage oil, either alone or blended with complementary essential oils like lavender or geranium.
Rose oil makes an excellent addition to homemade beauty products. Mix it into body butters, lip balms, or sugar scrubs. Use it as a natural perfume by dabbing small amounts on pulse points. The gentle nature of rose-infused oil makes it suitable for most skin types, though those with petal allergies should perform a patch test first.
Troubleshooting Common Issues
If your oil develops mold or an unpleasant smell during infusion, moisture is likely the culprit. Ensure petals are completely dry or properly wilted before beginning. If the scent seems too weak, try creating a double infusion with fresh petals. For those seeking a more concentrated aroma, consider adding a drop or two of pure rose essential oil to your finished product, though this is entirely optional.
Conclusion
Learning how to make rose oil at home is a simple yet deeply satisfying process that yields a beautiful, multipurpose product. Whether you choose the patient sun method or the quicker heat approach, you’ll create something unique that reflects the care and attention you’ve invested. Start with small batches to perfect your technique, experiment with different rose varieties to discover your favorite scents, and enjoy the ancient art of botanical oil making. Your skin, senses, and perhaps lucky gift recipients will thank you for this fragrant endeavor.


Leave a Reply